Home › Admin & Manager Guides › Call Queues
Call Queues
Call queues route calls to groups of users ("agents"): the queue holds the caller, then presents the call to agents based on the queue type. Office Managers and Call Center Supervisors can create, modify and delete call queues.
Creating a Call Queue
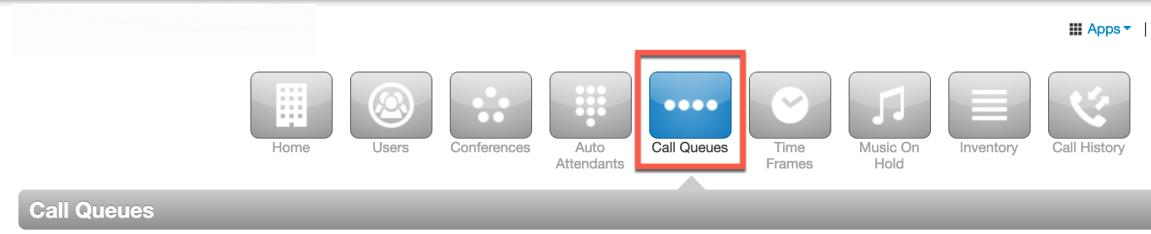
- Log in to the Portal as an Office Manager or Call Center Supervisor and click Call Queues at the top of the page.
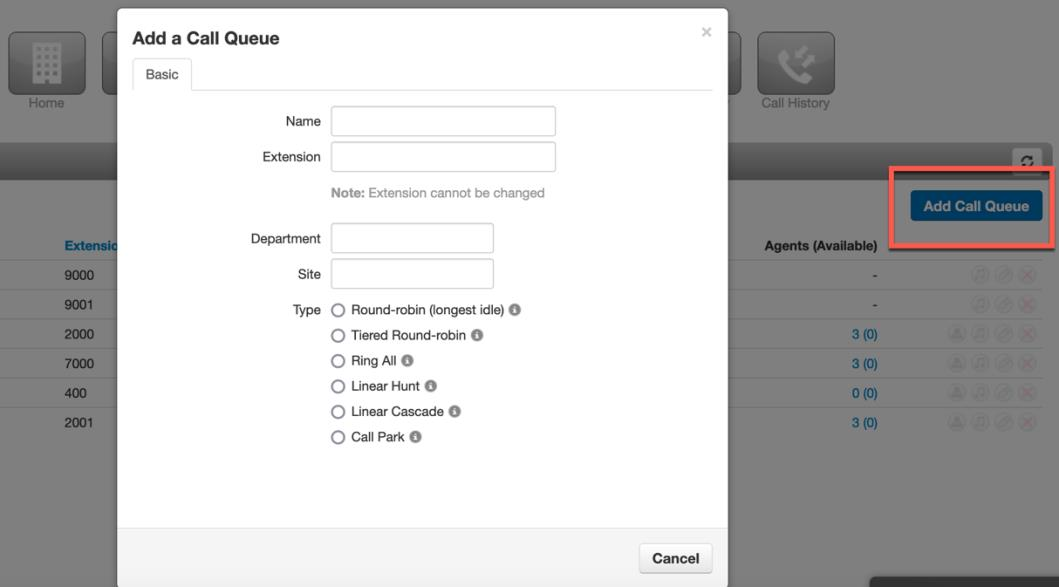
- Click Add Call Queue on the right side of the screen.
- Fill in the Basic information:
- Name — a unique name for the queue.
- Extension — choose a number from 8500–8999.
- Department / Site — optional, informational only.
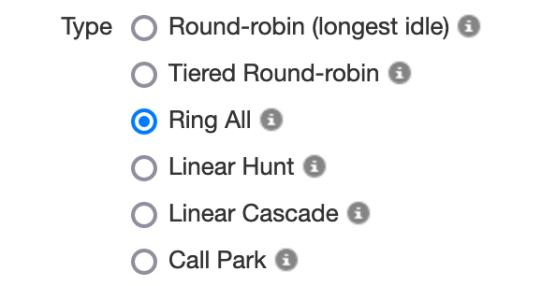
- Type — how calls are presented to agents:
- Round-Robin — the available agent who has been idle longest.
- Tiered Round-Robin — round-robin with escalating tiers.
- Ring All — all available agents at the same time.
- Linear Hunt — agents in a pre-defined order.
- Linear Cascade — groups of agents in a pre-defined order.
- Call Park — holds the caller until an agent manually retrieves the call.
- Phone Number — lets callers dial the queue directly; available numbers appear in the drop-down.
- Record Calls — records all calls through this queue (found in Call Center or Call History).
- Statistics — collects queue statistics for Call Center Reports.
- Click Next for the Pre-Queue Options tab.
Pre-Queue Options
Conditions that must be met before the queue accepts a call:
- Require agents — at least one agent must be logged in before calls enter the queue. Recommended if agents actively log in/out.
- Queue Audio — what waiting callers hear: hold music or a ring tone.
- Require intro MOH — plays a specific message before the caller connects to an agent (created in Music on Hold).
- Max Expected Wait (seconds) — when the queue's average wait reaches this, the queue becomes unavailable to new callers.
- Max Queue Length — maximum callers waiting before the queue is full.
- Allow Callback Option — callers can request a callback instead of waiting.
- Forward If Unavailable — where callers go if the queue is full or no agents are logged in: an overflow queue, voicemail, user, or auto attendant.
In-Queue Options
These vary slightly by queue type:
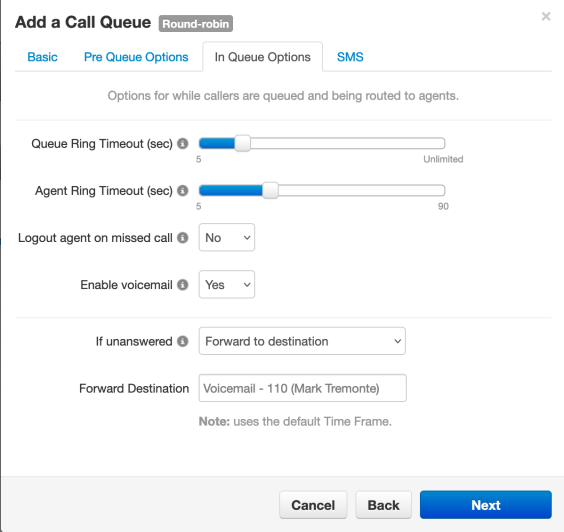
- Queue / Agent Ring Timeout (seconds) — how long the queue presents a call to an agent before trying the next agent, and how long a call stays in the queue before being sent elsewhere.
- Logout Agent on Missed Call — logs an agent out of the queue when they miss a call.
- Enable Voicemail — offers (or forces) voicemail when the queue is unavailable.
- If Unanswered — where the call goes after the queue ring timeout: overflow queue, voicemail, user, or auto attendant.
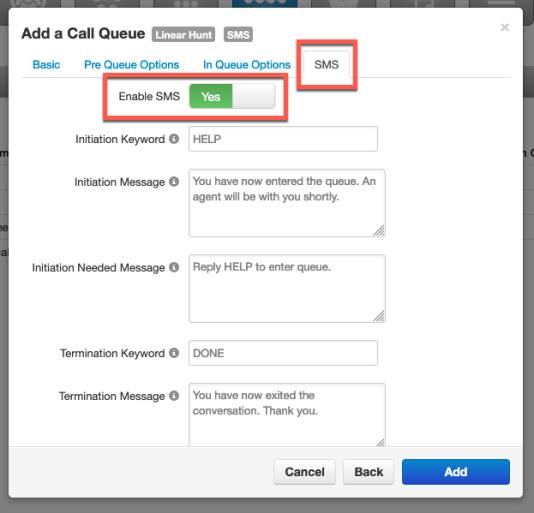
Click Next for the SMS tab. If your company has completed Campaign Registry and has SMS enabled, you can let callers text the queue — click Enable SMS and customize the options (see SMS & Text Messaging). Finally click Add to finish; the queue can be edited anytime from the Call Queues page.
Adding Agents to a Call Queue
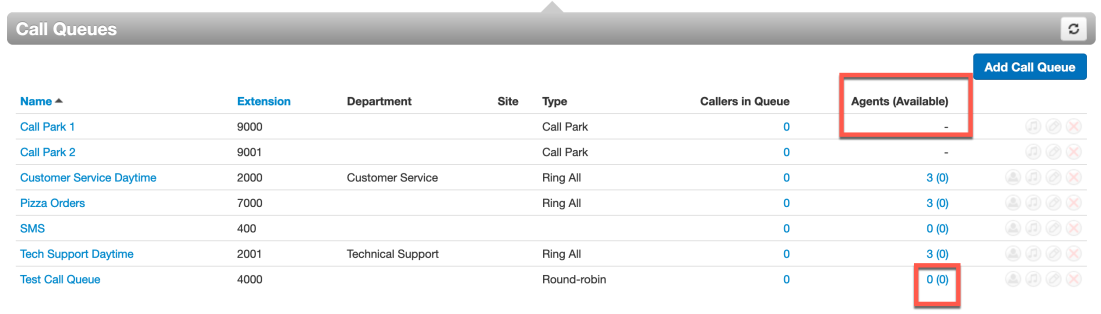
- In the Portal, click Call Queues.
- Find the queue and, in the Agents (Available) column, click the 0(0) link to open the agent menu.
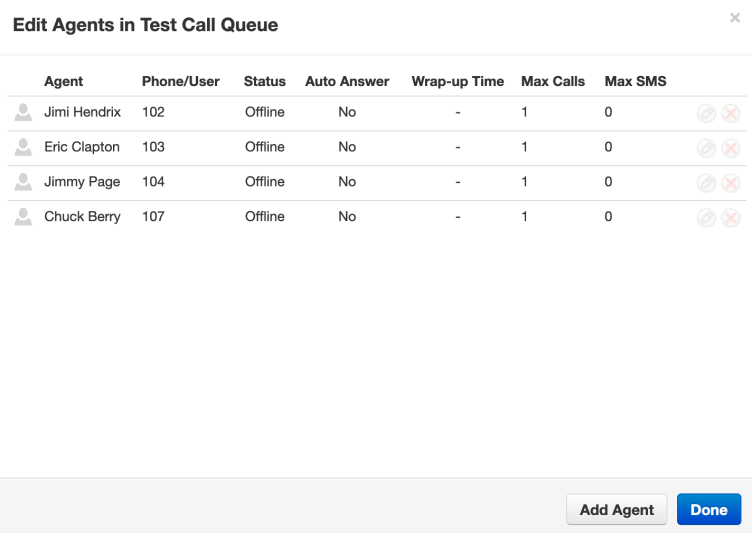
- Click Add Agent and work through the options:
- Add Agent(s) by — user name/extension, or phone number to add an external number.
- Agent Extension — add as many users as needed.
- Status — enables the agent to receive calls; also lets supervisors join a queue without receiving calls.
- Wrap Up Time (seconds) — breathing room before the agent can get the next call.
- Max Simultaneous Calls — cap on concurrent calls per agent.
- Max SMS Sessions — cap on concurrent SMS conversations.
- Queue Priority for Agent — priority when the agent serves multiple queues.
- Request Confirmation — tells the agent it's a queue call; press 1 to accept.
- Auto Answer — automatically answers the call for the available agent.
- Click Save Agent. All agents in the queue can be edited from this screen.
💡 Agent tip: agents log in/out of queues with star codes
*50 (available once), *51 (available), *52 (not available) — see Feature Codes.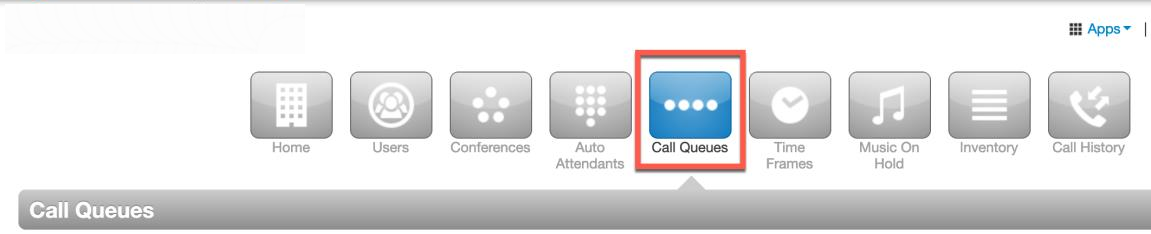
Related: Call Center for Supervisors · Music on Hold · SMS
↑ Back to top