Home › Admin & Manager Guides › Managing Users
Managing Users
The Users section of the Portal for Managers lets you manage everyone in your domain from one place: add, edit, delete and reset users, create ring groups, and add shared contacts. These actions require an admin or "Office Manager" scope.
How to Add a User
Before you start, it helps to have the following on hand:
- First and last name of the new user
- Extension number
- The user's email address
- The MAC address of the phone they will use (optional)
- Their user license
- Open the PrimeCall Portal at login.primecall.com/portal as Office Manager or above.
- Click Users in the navigation row at the top.
- On the right side of the screen, select Add User.
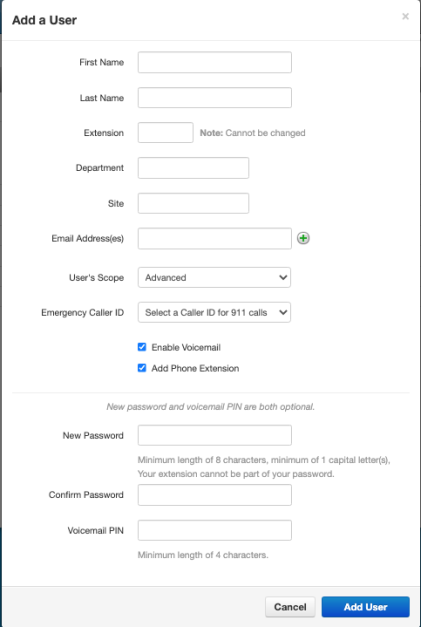
- Fill out the "Add a User" form:
- First / Last Name — the user's name.
- Extension Number — at least three digits, any number from 100–8999 except the reserved numbers below.
- Department — optional, for organizational purposes only.
- Site — optional, for multi-location businesses.
- Email Address — the user's email address.
- User's Scope — contact PrimeCall to confirm which licenses you have. See User Scopes.
- Emergency Caller ID — required, set up by PrimeCall. If the user will be at a location or number not in the drop-down, contact PrimeCall to add it to your emergency caller IDs.
- Enable Voicemail — gives the user a personal voicemail box.
- Add Phone Extension — activates the extension number you created.
- Password Option — set a password or leave blank; the user will set their own on first login.
- Voicemail PIN — the default is
1234unless changed.
- Select Add User. The new user is added to the platform.
⚠ Reserved extensions — do not use for users: 111, 211, 311, 411, 511, 611, 711, 811, 833, 911, 933, 999, 5000–5001, and 9000–9999.

How to Edit an Existing User
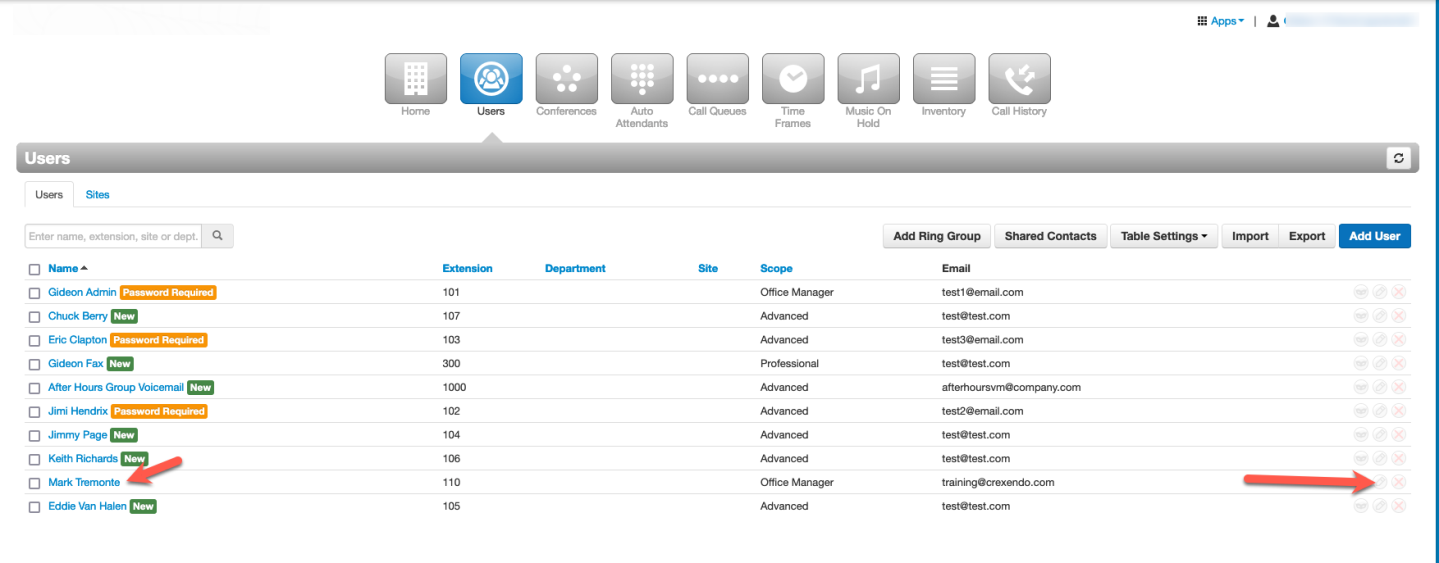
- Open the Portal as Office Manager or above and click Users.
- Locate the user and click their name (or the edit button to the right of it).
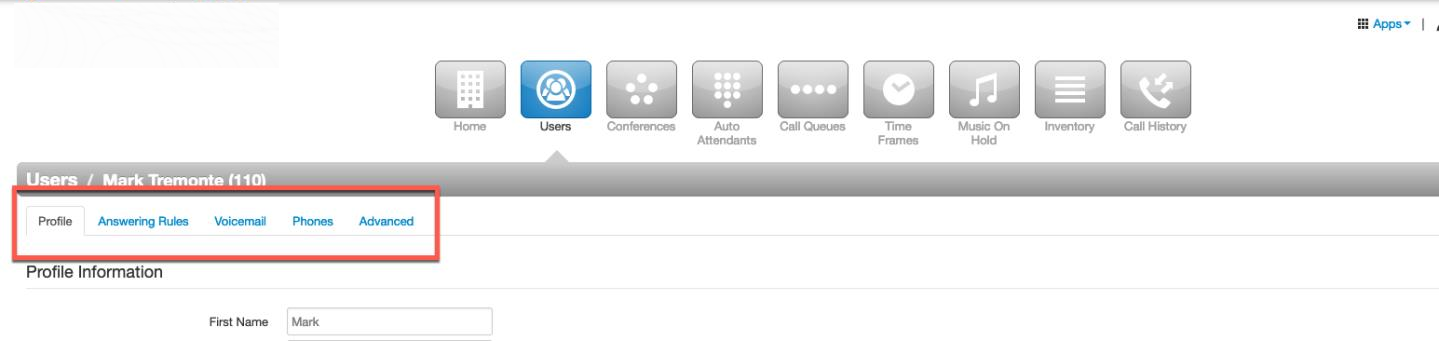
- Use the tabs to edit each area:
- Profile — the information entered when the user was created; you can also verify or edit the user's Caller ID here.
- Answering Rules — shows the active default rule and any rules the user created; you can add rules for the user here too.
- Voicemail — enable/disable voicemail, plus inbox options, greetings and email notifications.
- Phones — every device tied to the user (web phone, mobile app, desk phones). For desk phones you can open Button Builder from this tab.
- Advanced — Reset User (assign the extension to someone new), Send Welcome Email (login information for a new user), and Force Password Reset (check the box to email the recovery link).
How to Delete or Reset a User
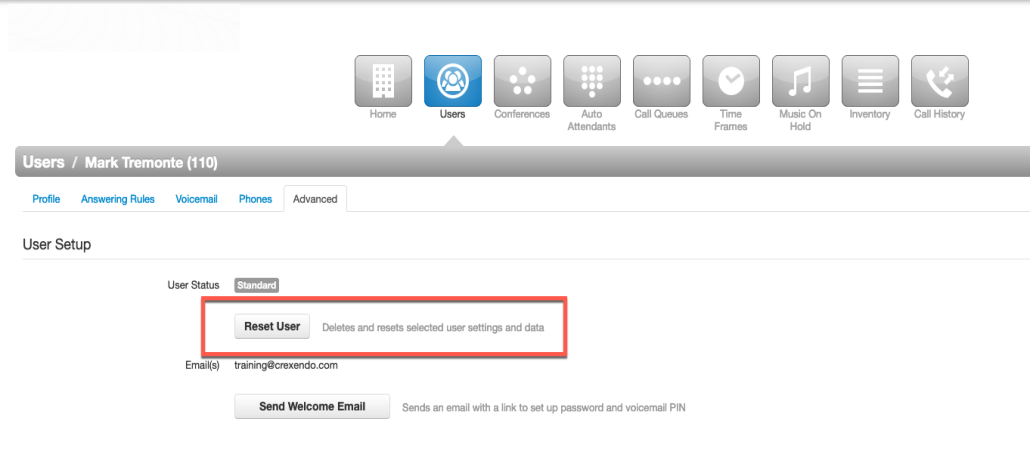
- Go to Users and click the user's name.
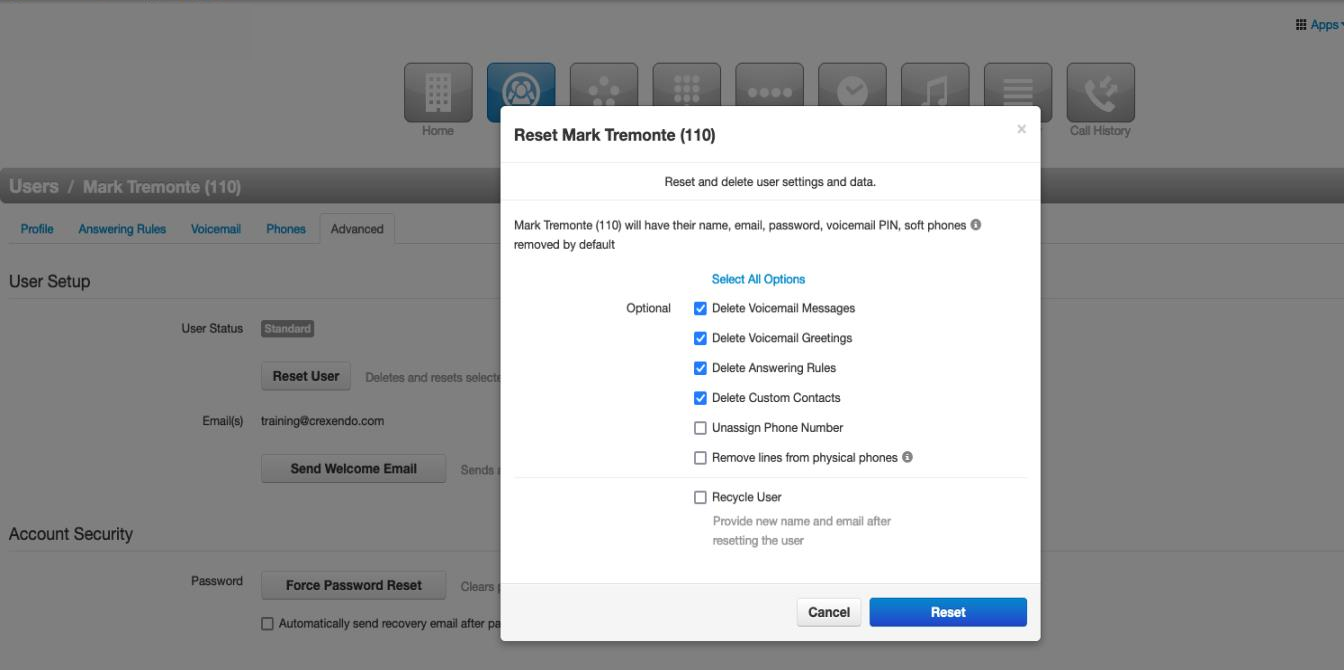
- Select the Advanced tab, then Reset User.
- Review the options. The portal automatically selects deleting the user's voicemail messages, greetings, answering rules and custom contacts. Then:
- Select Unassign Phone Number if the user has a direct phone number.
- Select Remove lines from physical phones to unassign their desk phone from the extension.
- If you're ready to hand the extension to a new user, select Recycle User; otherwise leave it unchecked and choose Reset.
- After the reset, the extension shows in Users as "setup required". Leave it until a new user takes it over, or delete it completely with the red X to the right of the user.
How to Create a Ring Group
Ring groups ring several extensions at the same time — like a Ring All call queue without all the queue options.
- Select Add Ring Group on the upper right of the Users page.
- Give the group a name, an extension, and optionally a department and site.
- Add the users to include. You can edit how long each user's phone rings.
- Set the Ring Timeout — how long callers wait before the call forwards on.
- Choose where unanswered calls go: a user, a user's voicemail, group voicemail, auto attendant, or call queue.
- Select Add Group.
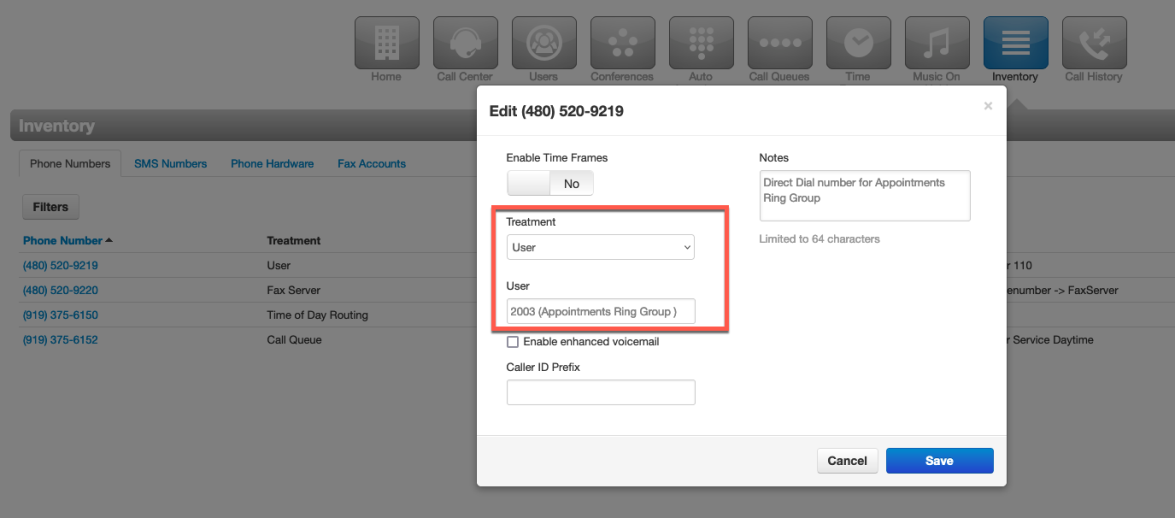
💡 Tip: Put the ring group into your call flow by assigning it to a direct dial number in the Inventory section.
How to Add a Shared Contact
Shared contacts appear in every user's contact list.
- Select Shared Contacts on the upper right of the Users screen.
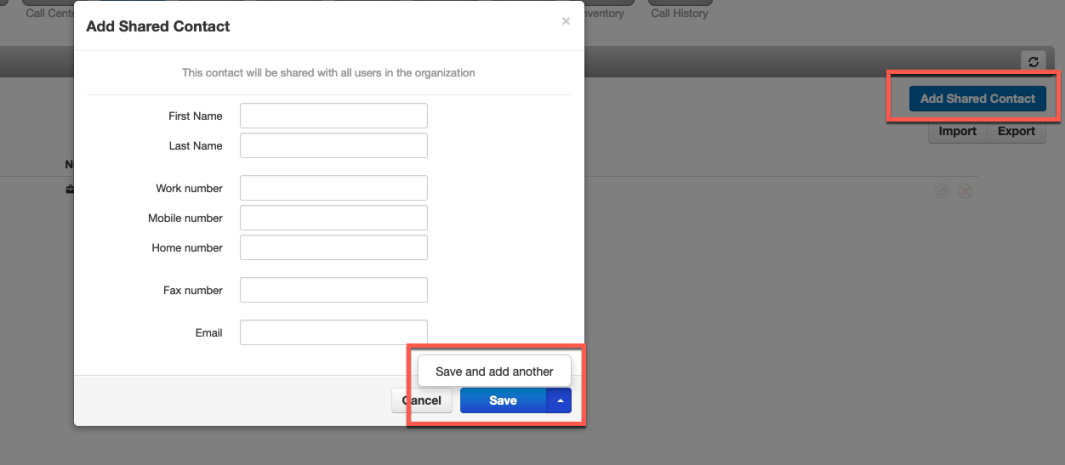
- Select Add Shared Contact to open the contact form.
- Fill in the information and click Save — or use the arrow to Save and add another.
Related: User Scopes · Call Queues · Inventory
↑ Back to top