Home › Admin & Manager Guides › Time Frames
Time Frames
Time frames are the periods you want your phone system to follow — business hours, after hours, holidays. A time frame by itself does nothing: it must be given an action, either in Inventory (for the domain) or in Answering Rules (for a user).
Creating a Time Frame for the Domain
- Log in to the Portal for Managers and select Time Frames.
- You'll see time frames created by users as well as your domain name. Click your domain name.
- Click Add Time Frame (upper right).
- Name it — e.g. Business Hours, After Hours, Holidays. The name can't be changed later without deleting the time frame.
- Choose when it applies — five options:
- Always — always in effect; serves as the catch-all when nothing else applies. Click Save.
- Days of the Week — a weekly schedule (business hours, after hours). Pick the days, set the hours per day, and use the drop-down arrow for weekly or custom recurrence.
- Specific Dates — a date range such as an office closure. Enter each date/time, add it, and set recurrence if needed. Click Save.
- Holidays — search the built-in national/international holiday list, pick your holidays and hours (whole day or business hours only), set Recurrence to Yearly on selected holiday, click Next, set observation rules (e.g. when a holiday falls on a weekend), then Save.
- Custom — combines days of the week, specific dates and holidays in one frame. Name it, select Custom and Save, then add the component schedules.
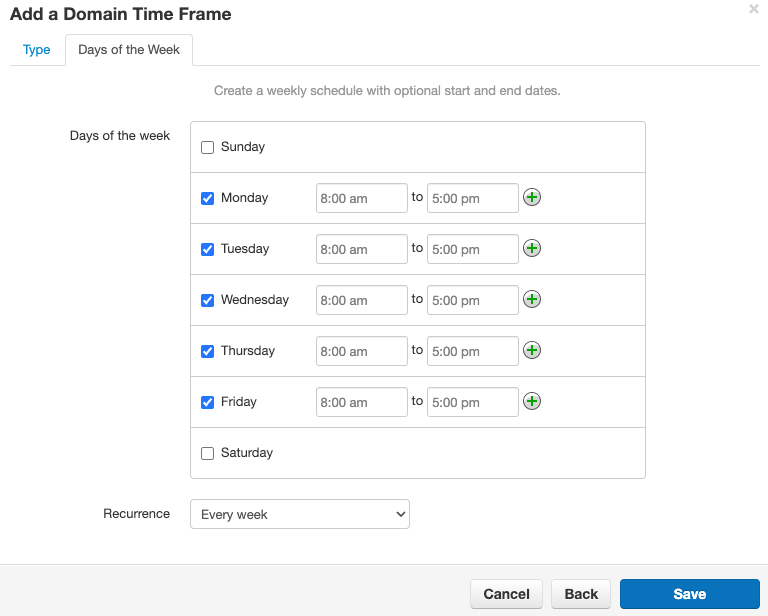
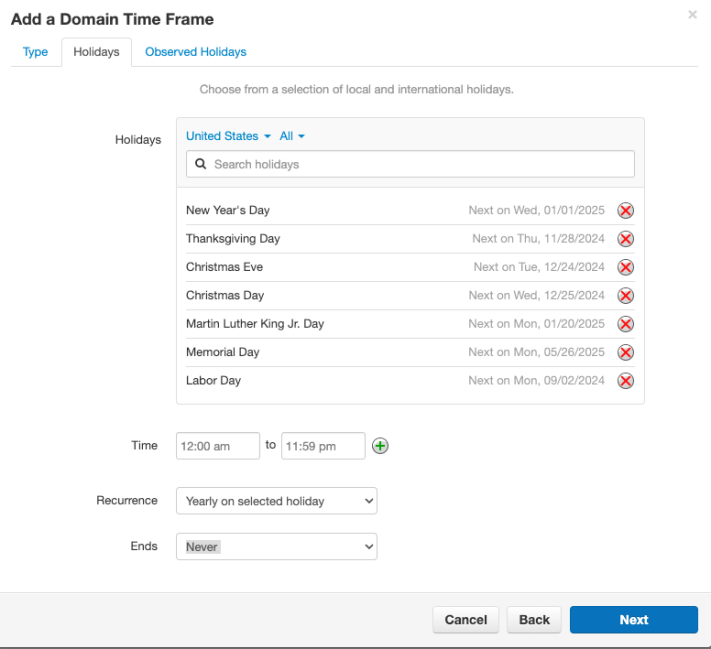
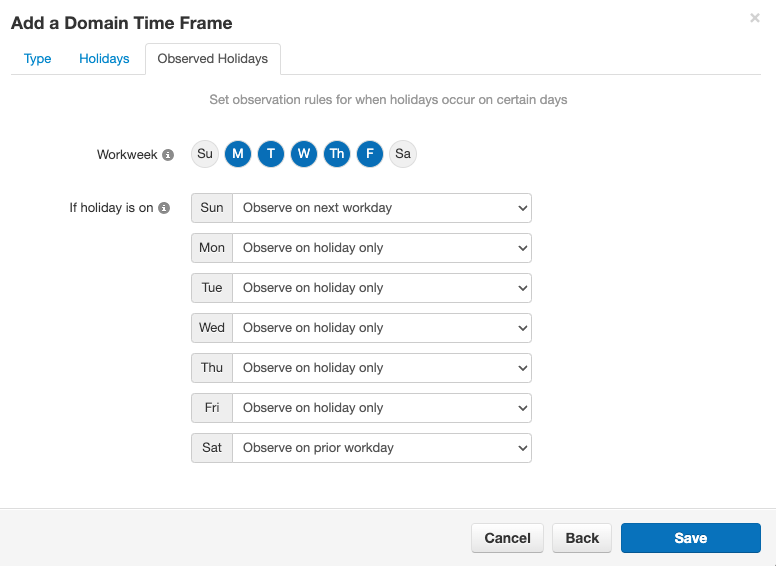
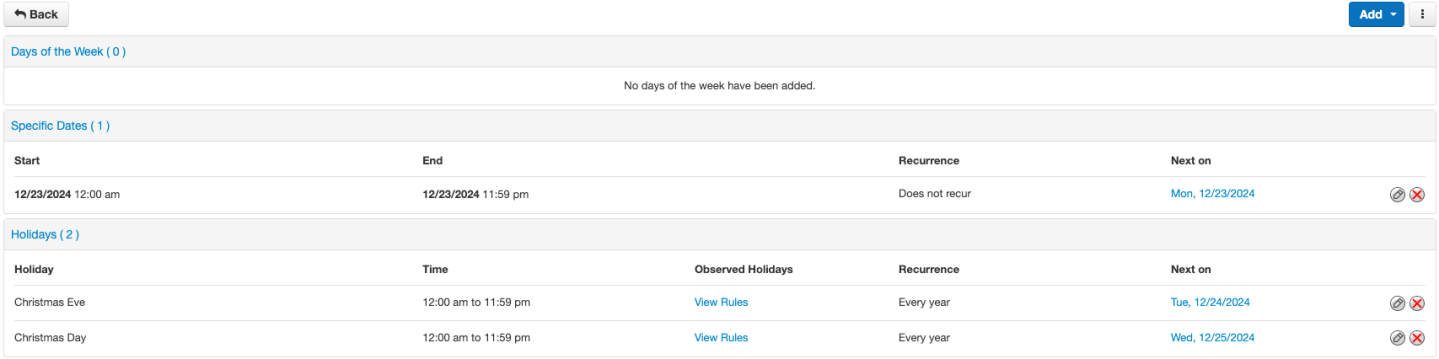
Enabling a Time Frame for the Domain
Associate the time frame with a phone number in Inventory (or with an auto attendant):
- Click Inventory at the top of the screen.
- Click the phone number to associate; a dialog opens.
- Switch Enable Time Frames to Yes.
- Use the drop-down arrow to add a rule, select the time frame and click the green +. Repeat for each additional time frame.
- For each time frame, pick a Treatment — user, call queue, voicemail, auto attendant, PSTN number, or fax server — then the specific destination. Click Save.
⚠ Order matters: keep your Holiday time frame at the top of the list and your Default at the bottom. Incoming calls check the list top-down and use the first applicable frame — if Holiday sits below Business Hours, the business-hours routing wins even on a holiday.
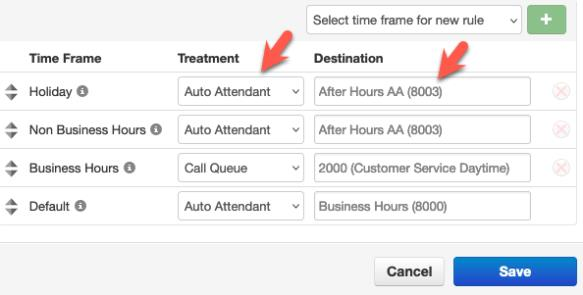
Time Frames with Auto Attendant Greetings
If one auto attendant offers the same options around the clock but you want different greetings by time frame:
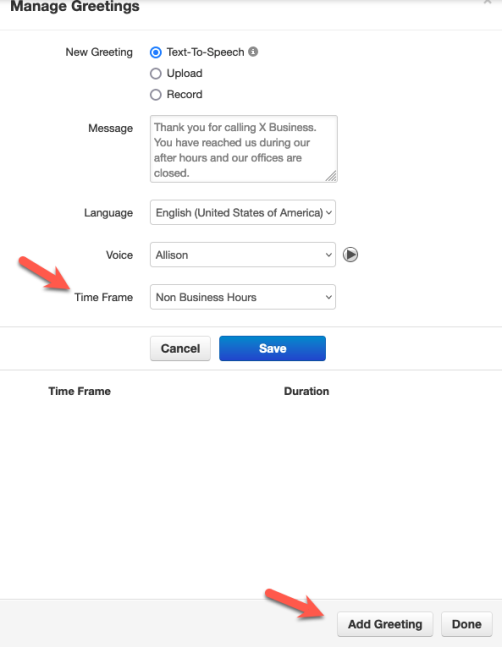
- Select Auto Attendants, open the attendant, and select Intro Greetings.
- Select Add Greeting, create it via Text-To-Speech, Upload or Record, and pick the time frame during which it plays.
- Add any further greetings the same way and click Save.
- In Inventory, select the phone number, keep Enable Time Frames set to No, choose Treatment Auto Attendant, enter the attendant's extension, and click Save.
ℹ Users have time frames too: individual users can create personal time frames plus answering rules in their own portal — see Portal for Users.
Related: Inventory · Auto Attendants · Portal for Users
↑ Back to top