Home › Admin & Manager Guides › Call Recording
Call Recording
Record calls in your domain for training and quality control. Recordings can only be turned on/off and listened to by an Office Manager, and are stored in the portal for 90 days unless offloaded to external storage.
Record a Call on Demand
From the Portal (desk phone call)
- While on an active call, open your Portal — the active call is displayed.
- Press the record option. Recording starts without alerting the caller.
From your desk phone with *81
- Place the call on HOLD (the caller hears hold music only).
- Press
*81to start recording — the caller is not alerted. - Take the caller off hold and continue.
- To stop: place the caller on hold again and press
*82.
From the web phone
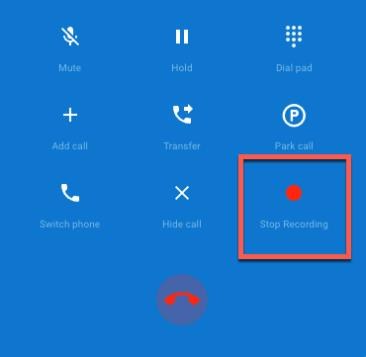
Select Start recording in the in-call options (no caller alert); select Stop Recording to end it.
Turn On Recording for a User
- Log in to the Portal for Managers and select Users.
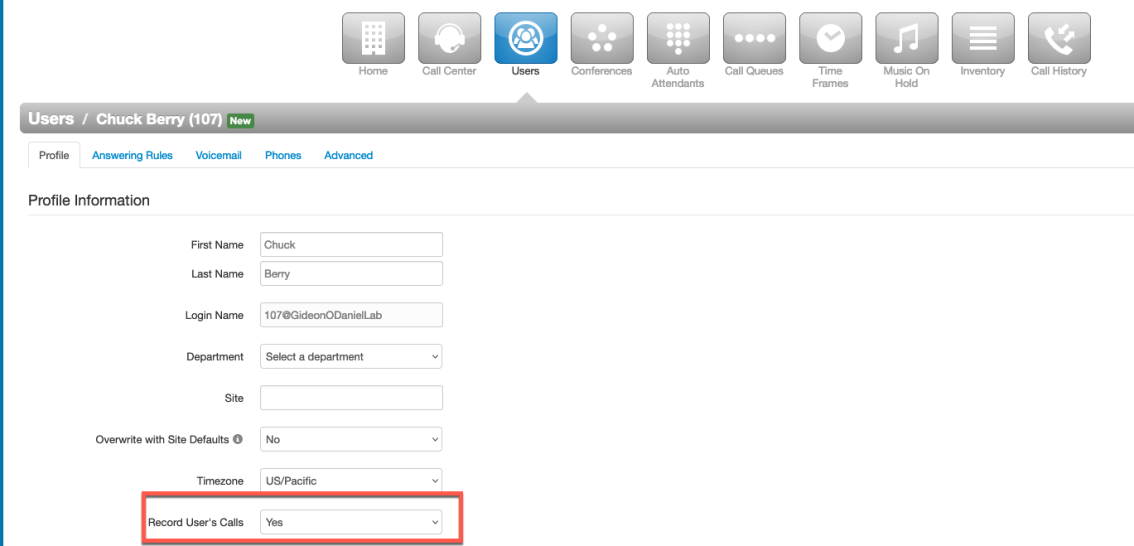
- Select the user, and in their Profile information open the Record User's Calls drop-down.
- Select Save. The user's recordings appear in Call History to listen or download.
Turn On Recording for a Call Queue
- In the Portal for Managers select Call Queues.
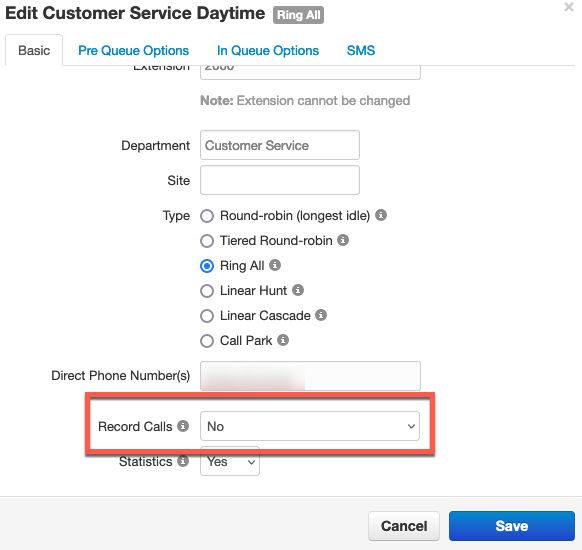
- Select the queue, and in the Basic tab set Record Calls to Yes.
- Select Save. Queue recordings appear in Call History and, if Call Center is enabled, in Call Center Reports.
Add Remote Storage (Keep Recordings Past 90 Days)
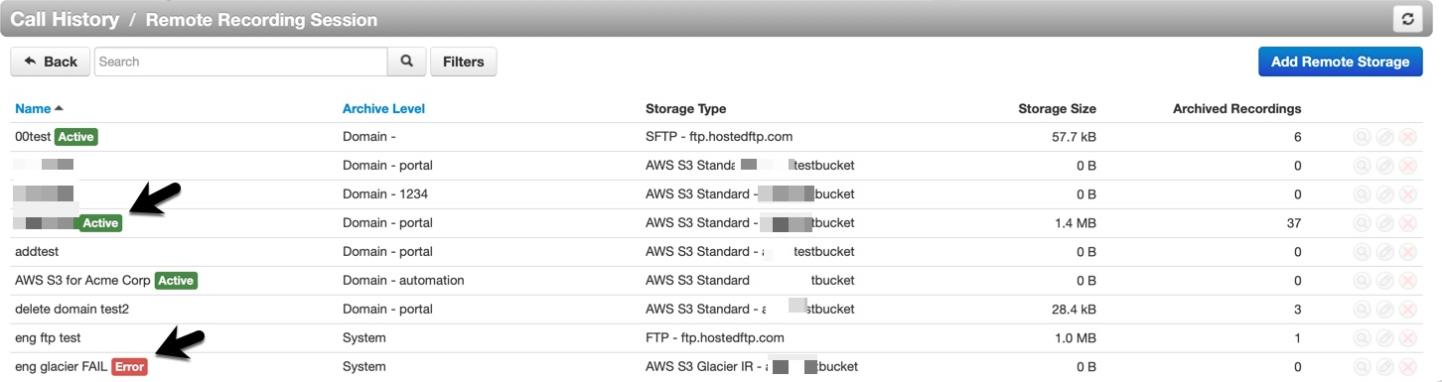
- In the Portal open Call History and select Recording Storage Settings. This opens the "Remote Recording Session" page listing all remote configurations — green active tags mean enabled, a red error tag means a configuration problem.
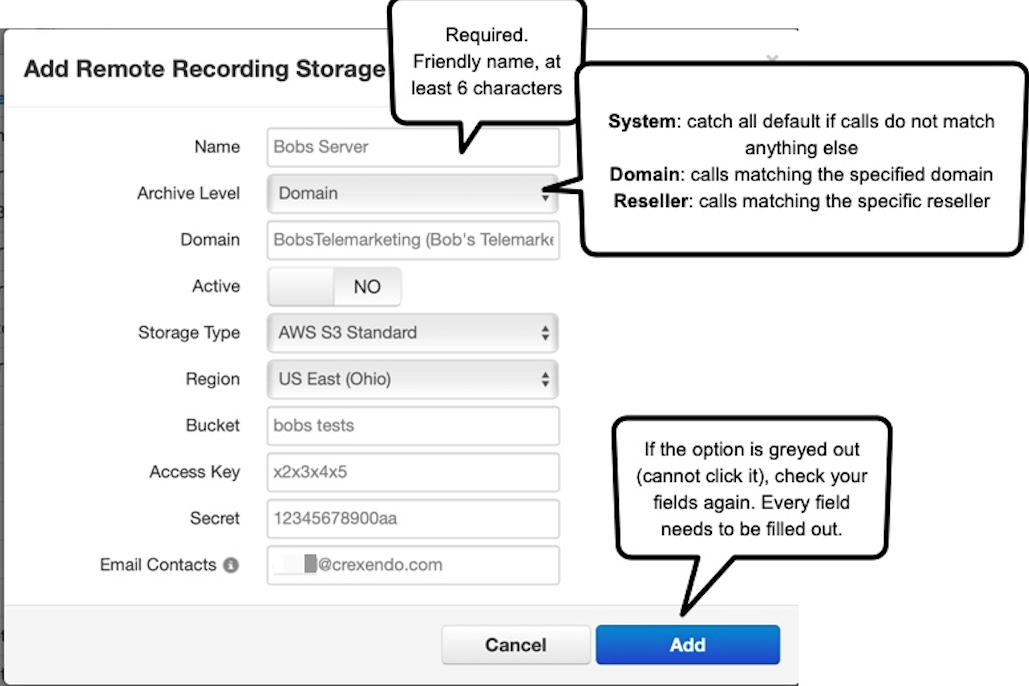
- Click Add Remote Storage. Choose a name and storage type — AWS S3 Standard, AWS S3 Glacier IR, Wasabi, FTP, or FTPS — and fill out the remaining fields.
- Archive Level — which calls are retrieved for remote storage. System is a catch-all for calls that don't match a specified Reseller or Domain. If Domain or Reseller is selected, there's no failover copy to other levels — each recording uses its single best enabled match.
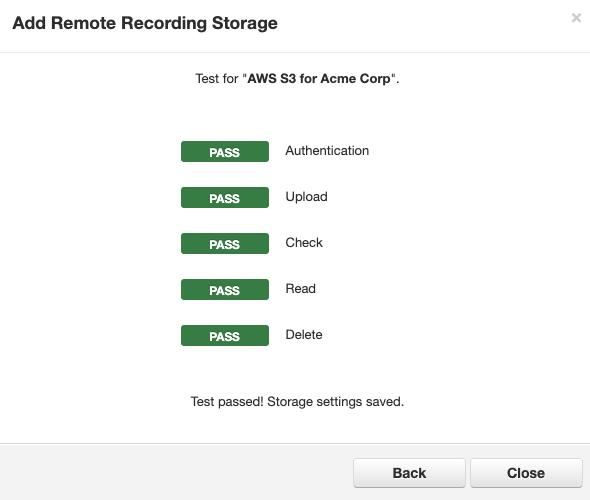
- Click Add. The system audits the configuration: it authenticates the remote side, uploads a small test .wav, reads it back, then removes it (takes 2–15 seconds).
- On success you'll see "Test passed! Storage settings saved." and the configuration joins the table with its storage size and archived-recording count.
ℹ Playback of archived files: listen the same way as any recorded call from Call History. Remote files have a small delay on first play; a local copy stays on the recording server for several hours to avoid repeated fetches.


Listen to Your Recordings
From Call History
- Select Call History, use Filters to find the call, then Filter.
- If a recording exists, use the play or download buttons.
ℹ Note: one call can produce multiple recordings — if user 1 transfers to user 2, the recording appears twice in Call History.
From Call Center
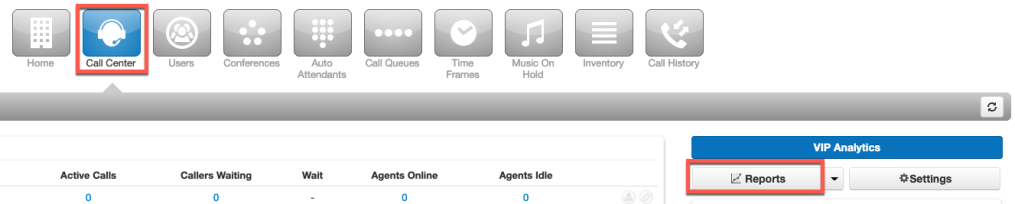
- Select Call Center → Reports.
- In Queue Stats or Agent Stats, click a number in the table to list the corresponding calls.
- Use the play or download buttons beside each call.
Related: Call History · Feature Codes · Call Queues
↑ Back to top