Home › Admin & Manager Guides › Fax
Fax
Send and receive faxes through email, the Portal, or a physical fax machine. Contact PrimeCall Customer Support to enable faxing or change your fax services.
Receiving Inbound Faxes
Once faxing is enabled, incoming faxes are delivered to the email address(es) of your choosing — one or many recipients. Every email attached to a fax number receives each fax sent to it.
Senders can reach you two ways:
- Physical fax machine — they fax your organization's fax number as normal.
- Email — they email the fax to
1[your ten-digit fax number]@fax.primecall.com. The email body becomes the cover page; the attachment is the faxed document.
Sending an Outbound Fax by Email
Only authorized senders can fax on behalf of your organization — provide PrimeCall the list of authorized email addresses. Senders receive periodic status emails (pending, sent successfully).
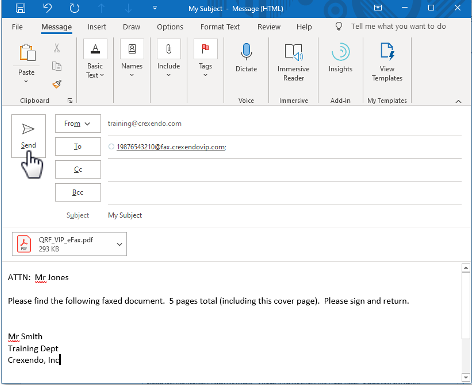
- Open a new email:
- TO:
1[destination ten-digit fax number]@fax.primecall.com - SUBJECT: fax subject
- BODY: cover-page content
- TO:
- Attach the documents to fax (maximum 3 attachments).
- Click Send. You'll receive a delivery-confirmation email afterwards.
Faxing from the Portal
Set up a user to fax from the Portal (Office Manager)
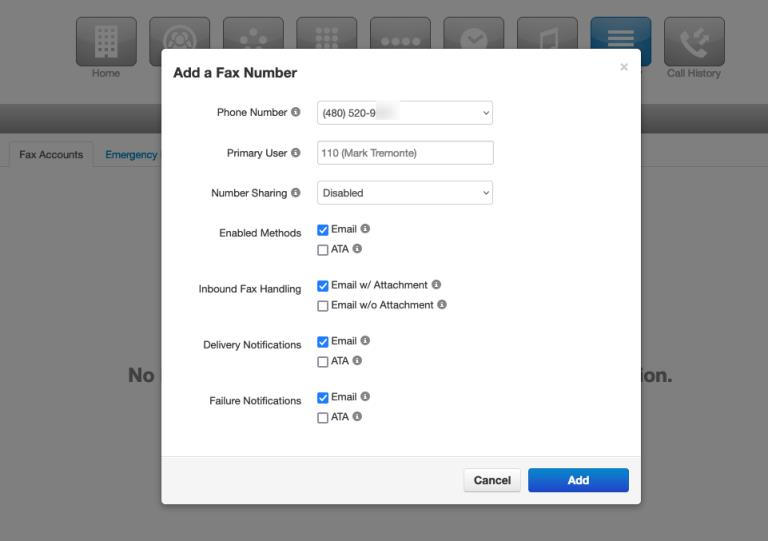
- Log in as an Office Manager and click Inventory → Fax Accounts tab → Add Fax Number.
- Fill in the form:
- Phone Number — select the fax number from the drop-down.
- Primary User — the owner of this fax number.
- Number Sharing — leave disabled (not currently available).
- Enable Methods — select Email only.
- Inbound Fax Handling — Email w/ Attachment (recommended) or Email w/o Attachment.
- Delivery Notifications — Email only (confirmation of successful delivery).
- Failure Notifications — Email only (confirmation of a failed delivery).
- Click Add.
Send a fax from the Portal
- Log in to your Portal. (Office Managers: click your name, upper right → My Account.)
- Select the Fax button at the top — your Fax Inbox opens; the drop-down arrow shows sent faxes.
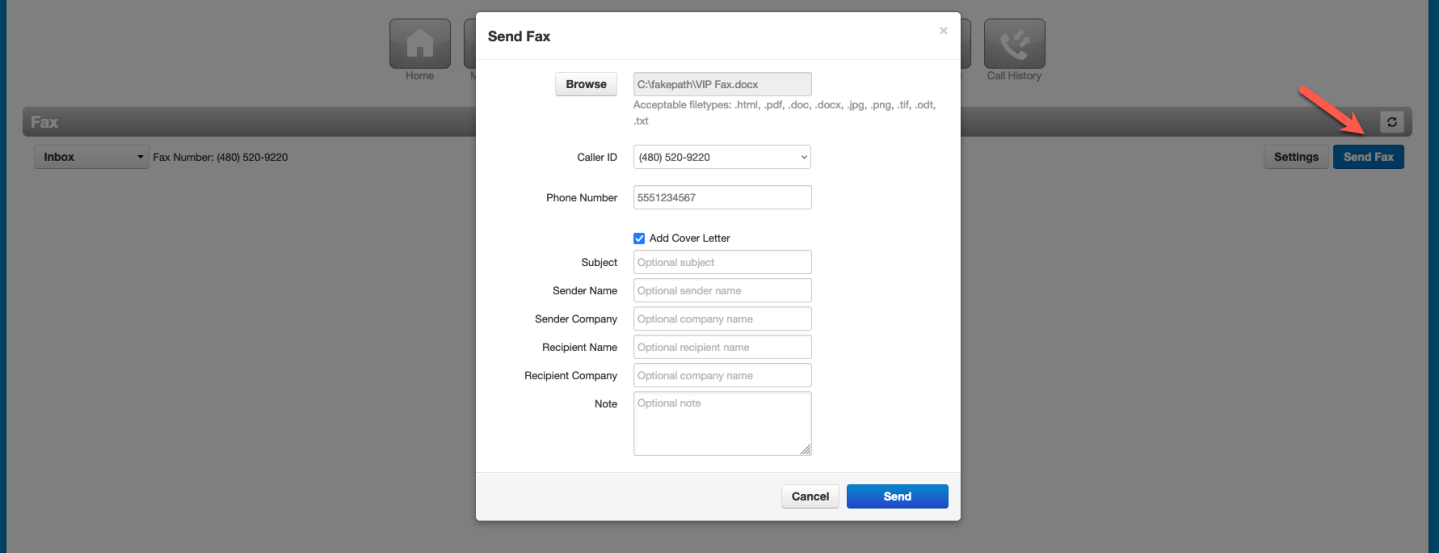
- Select Send Fax (right side).
- Click Browse to attach the document. The Caller ID shows your fax number.
- Enter the destination fax number.
- Optionally select Add Cover Sheet and fill in the blanks.
- Click Send. Check status under Sent faxes or in your email confirmation.
Physical Fax Machines (ATA)
To keep using an existing fax machine, contact PrimeCall Sales to order an ATA (analog telephone adapter).
- Connect the fax machine's RJ11 port to the ATA's RJ11 port with an RJ11 cable, then connect the ATA's network port to your network switch/wall jack with a network (RJ45) cable.
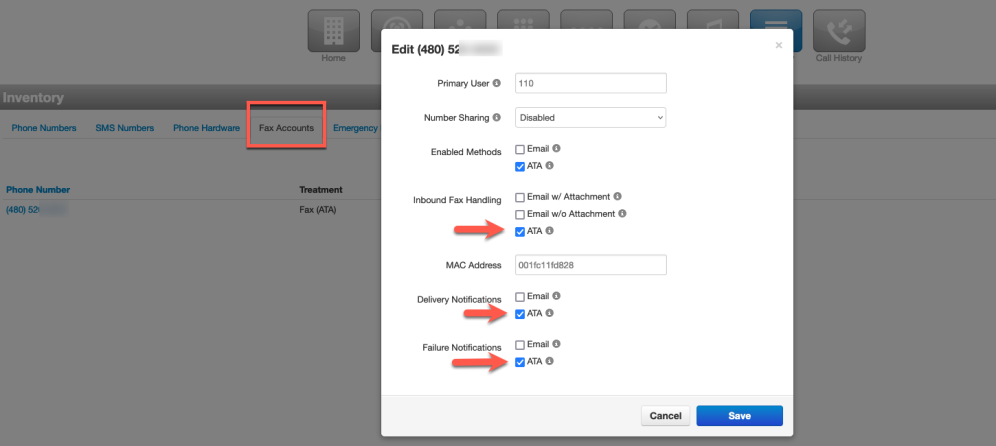
- Log in to the Portal as Office Manager → Inventory → Fax Accounts → Add Fax Number.
- Fill in the form: Phone Number, Primary User, Number Sharing disabled, and set Enable Methods, Inbound Fax Handling, Delivery Notifications and Failure Notifications all to ATA only. Enter the ATA's MAC address.
- Click Add.
Related: Inventory: Fax Accounts · Portal for Users
↑ Back to top